Saturday, January 23, 2010

Apprentice Baldric

This is my current project (well, at least the one I am trying to do over all others right now). It is an 'apprentice baldric' and was tasked on me by my laurel Mistress Mathilde. It has a green velvet base with padded goldwork - kind of a goldwork sampler.
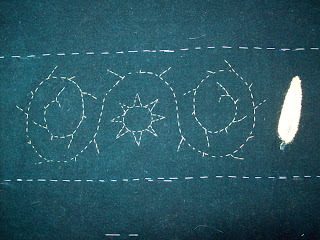


The baldric is to go with my red brocade houpelande (sp?). It will be fringed with a bunch of silver bells (hoorah!). The design is adapted from an embroidered linen shirt, though it has been changed quite a bit. The motifs of acorns and central sunny splendour are to represent Mathilde and the feathers represent my proposed heraldry. I am fond of the acorns... aren't they so cuuuute? :P Isn't it great to be a walking billboard of owned-ness (lol - Georgia knows what Im talkin' 'bout!)

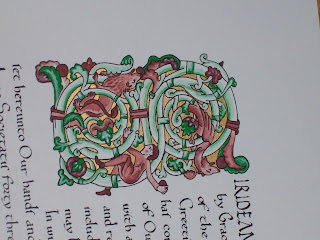
First Illumination - AoA Scroll

This is my first attempt at illuminating a scroll. It is an AoA from the reign of Siridean and Siban. The calligraphy is printed onto the thick card before hand, so it is more like 'paint by numbers'. We also had three colour combinations to choose from as a guide, the instruction of Leonie DeGrey and a whole bunch of gouache. Oh yeah :P


First Embroidery... ever....


Alrighty then. This is where the madness began. I had been in the SCA a couple of months... literally... and I was at my first ever A&S meeting at the Baronial dwelling where Mistress Porsha was trying to recruit people to embroider the lids of pouches that were being made for the K&Q (Alfar and Guthrin (sp?) to present to all of the Barons and Baronesses. I had never embroidered in my life, and yet put up my hand (how very like me) and here are the results. Once these two were done (for Isobel and Alessandro) I also helped sew my first ever eyelets on some of the pouches at festival 07. I have long since fallen out with eyelets (lol).

Friday, January 22, 2010

Goldwork Cuffs


These are a pair of cuffs made for Engelin's coronation. The base is red silk and the emroidery is couched gold jap. The first roundel has 4 cicada/bee insects alternating around triangle spirals. The second roundel is a flower with triangle spirals between the petals. The design is Merovingian and was composed by Mistress Porsha. Unfortunately it is difficult to take a nice photo of the cuffs due to the shiny silk and shiny gold thread, but hopefully you get the jist of them :) Below is a pic of Theoderic and Engelin at their coronation, in which you can see one of the cuffs.

Mouse Pouches


hese are two mouse pouches I made. The pouch itself is red wool with cotton fingerloop braid for the edging/handle. The mice are chain stitched with white wool. *squeak*squeak*

Bayeux Tapestry Style

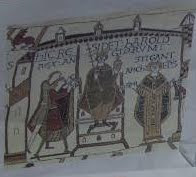
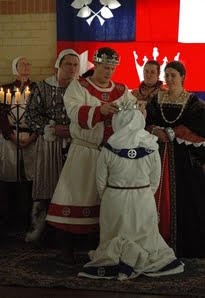
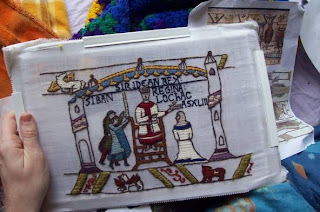
Isobel le Breton and myself worked to design and produced a gift for Siridean and Siban during their reign. The reign was in the style of Norman/Anglo Saxon around 1066 and so it was only fitting we did a panel from the Bayeaux Tapestry.

The first is a pic of the frame we based our frame on.

The second pic is of the coronation of Siridean and Siban.

Third is a pic of our work - a combination of the original frame of the tapestry, the coronation photo and our own personal touches (e.g. the animals in the borders). If anyone would like to read the documentation we wrote on this work, just let me know and I will email it to you :)


Split-Stitchin'

Split-stitch is one of my favourite stitches. It is relatively fast and great for 'freestyle' type patterns. So here are some pics of some of my split-stitch items :)
Top is a badge for Mistress Isobel le Breton and Bottom is 2/3rds of a firestriker and flint badge.

More pics to come.

Monday, January 18, 2010

Pewter-licious

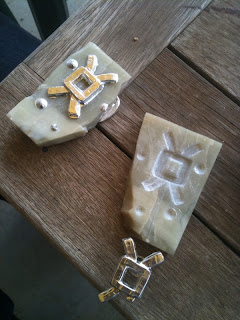
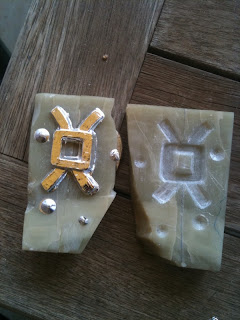
These are photos of my first ever attempt at pewter casting. The mold is made up of three soapstone parts: the base (with the carved mill-rind) and two top pieces (sitting side by side on the left hand side).

The design is a mill-rind, which happens to be the charge of the Burbage house device.

I was quite surprised by how easy it was to carve into the stone. A pocket knife, metal file and two drill bits were used to carve the shapes and a hand saw was used to cut the blocks. The pewter was sourced from some old cups which were melted in a saucepan on a regular gas stove-top.

It was quite fun to watch the cups melt :P When the pewter is nice and hot and melty it is poured into a hole that sits in between the two top mold pieces (left hand side in both pics, they are sitting right up next to each other). You have to tip it quite quickly so as not to allow the pewter to cool at all; if it cools it doesn't pour all the way through the mold and you only get half of your shape cast.

I made these mill-rinds as badges for my household (literal badges). I made 18 in all and have now glued pins to the back - hooray for household bling :D